7 Topic B: The base position
The Home Row
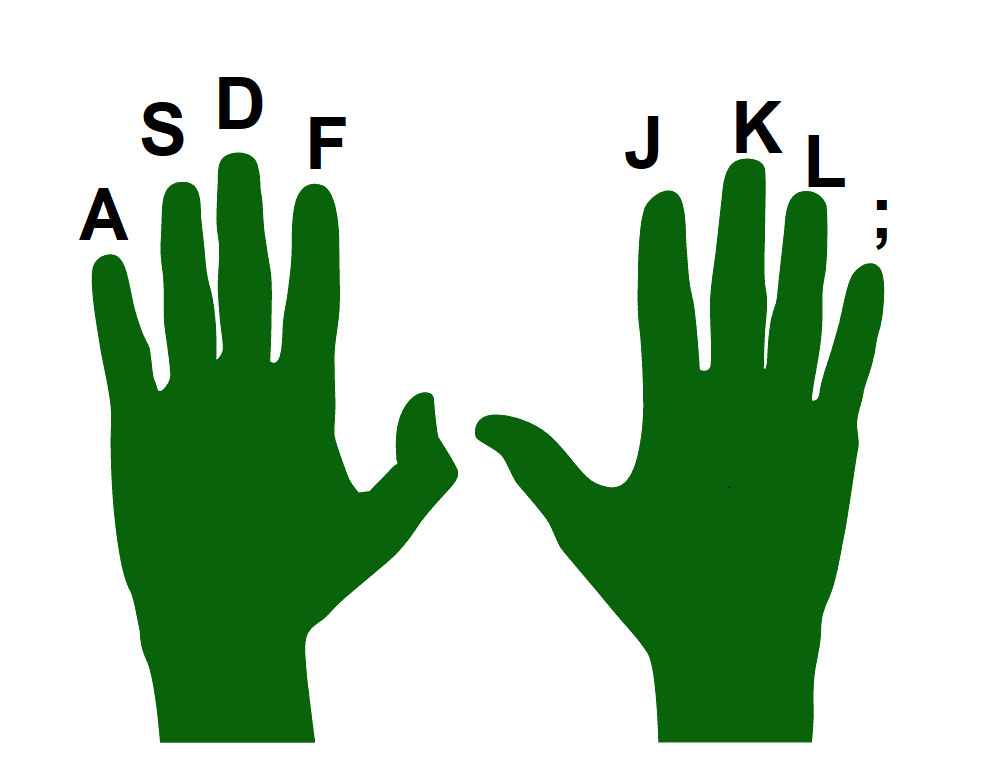
The home row is the set of keys that are the base position for fingers. These are the keys located on the middle row of the keyboard.


- Always try to return your fingers to the base position when you are not typing.
- Keyboards usually have small bumps on the F and J keys. They help the users locate the base position without having to look.
- Place the index fingers over the “F” and “J” key.
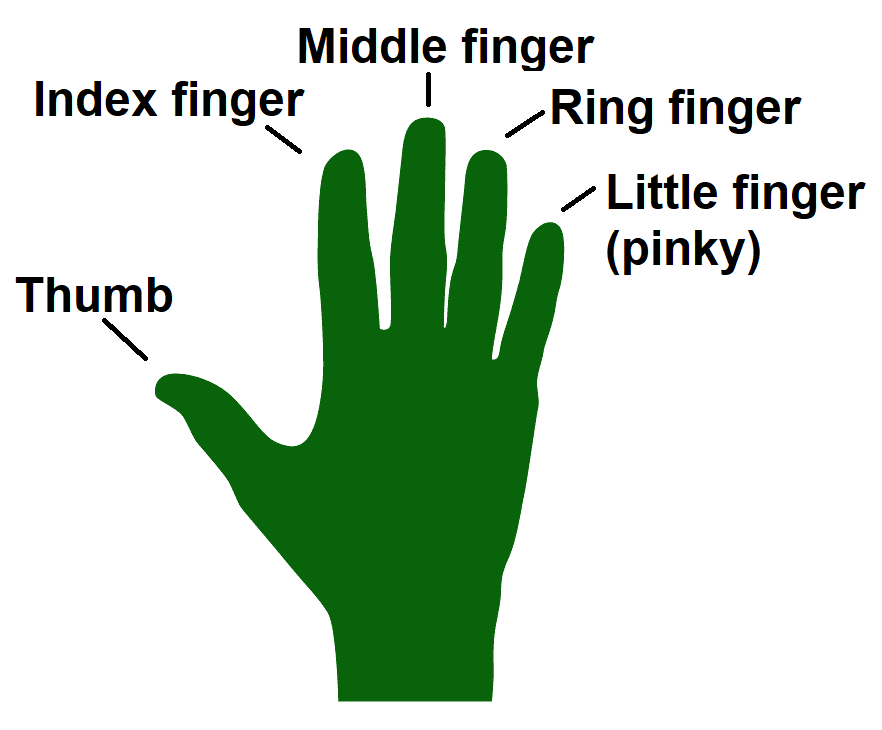
Finger names

Touch Typing Rules
Colour-coded chart
- Always position your fingers properly on the keyboard to press the right keys when typing.
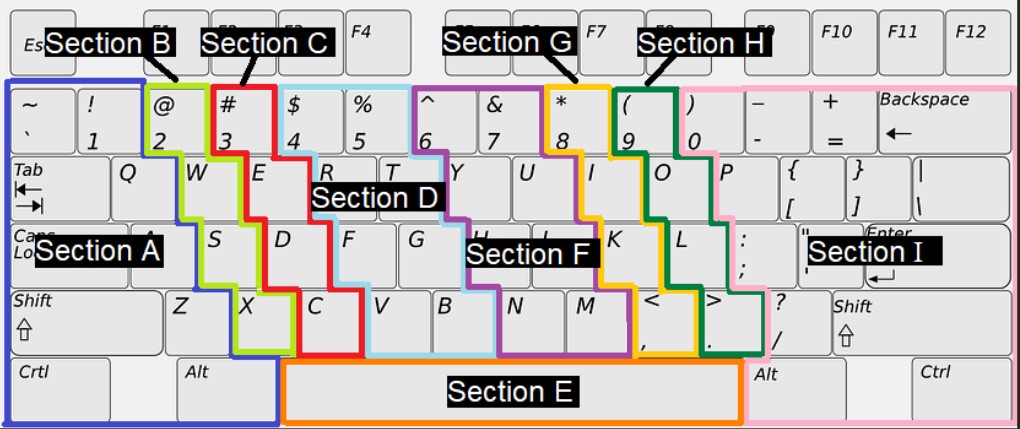
- The colour-coded chart below shows which finger should press each key.


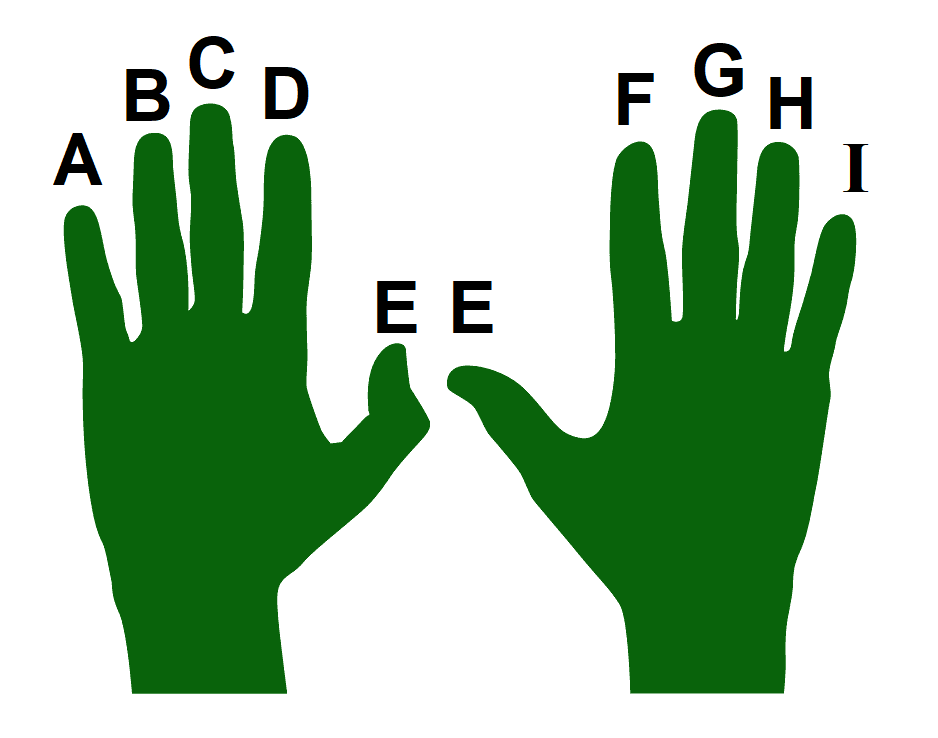
Correct finger placement
- Press all Section A keys with the left little finger
- Press all Section B keys with the left ring finger
- Press all Section C keys with the left middle finger
- Press all Section D keys with the left index finger
- Press all Section E with either thumb
- Press all Section F keys with the right index finger
- Press all Section G keys with the right middle finger
- Press all Section H keys with the right ring finger
- Press all Section I with the right little finger
Typing Speed
Ways to improve typing speed
- Familiarizing yourself with the keyboard layout can improve your typing speed.
- Develop good typing habits; focus on hitting the right keys.
- Take your time when you have just started learning; slow down to be accurate.
- Learn to be accurate first, then improve speed.
- Not only practice often, but practice correctly.
- Speed will come naturally through practice, repetition, and time.
Take online typing tests
- Some online typing speed test tools can determine how many words per minute (wpm) you type and how accurate your typing is.
- There are many free typing tests available online, such as:
Image Descriptions
Home row image description: the base position keys for the left hand are:
- Little finger: A key
- Ring finger: S key
- Middle finger: D key
- Index finger: F key
The base position keys for the right hand are:
- Index finger: J key
- Middle finger: K key
- Ring finger: L key
- Little finger: Semi-colon key
Labelled keyboard image description: a standard keyboard with the keys grouped into sections labelled A to I from left to right. Each section corresponds to a finger that would press the keys in that section.
- Section A keys are pressed by the left little finger. The keys include the back quote, Tab, Caps Locks, Shift, Control, the number 1, letters Q, A, and Z, and Alt.
- Section B keys are pressed by the left ring finger. The keys include the number 2 and letters W, S, and X.
- Section C keys are pressed by the left middle finger. The keys include the number 3 and and letters E, D, and C.
- Section D keys are pressed by the left index finger. The keys include numbers 4 and 5, and letters R, T, F, G, V, and B.
- Section E key is the space bar. The space bar can be pressed by a thumb on either hand.
- Section F keys are pressed by the right index finger. These keys include numbers 6 and 7, and the letters Y, U, H, J, N, and M.
- Section G keys are pressed by the right middle finger. These keys include the number 8 and the letters I and K, and the comma.
- Section H keys are pressed by the right ring finger. These keys include the number 9 and the letters O and L, and the period.
- Section I keys are pressed by the right little finger. This includes the rest of the keys on the right side of the keyboard, including the number 0, the hyphen, the equals sign, the delete key, the letter P, the open bracket, the close bracket, the backslash, the semicolon, the apostrophe, the enter key, the forward slash, the shift key, the Alt key, and the Control key. [Return to Labelled keyboard]

