
PowerPoint Practice 3

Prefer to watch and learn? Check out this video tutorial:
Complete the following Practice Activity and submit your completed project.

We will continue to work with the PowerPoint presentation from PowerPoint Practice 2. You have been asked by the Student Affairs Dean to add additional content to the presentation including resources to help students succeed. Key skills in this practice include using smart guides and the ruler, inserting text boxes and shapes, using the eyedropper, SmartArt, WordArt, and Shape Styles.
- Start PowerPoint, notice how it opens in Backstage View. Under Open, browse to locate your PowerPoint_Practice_2, and select open.
- Select File, Save As, Browse, and then navigate to your PowerPoint folder on your flash drive or other location where you save your files. Name the presentation as Yourlastname_Yourfirstname_PowerPoint_Practice_3.
- There should be 6 slides in your slide deck. Ensure your presentation is in normal view and select slide 5.
- With slide 5 active, on the home tab, in the slides group, select the arrow under new slide and add a new slide with the Title and Content layout. This will be your new slide 6.
- In the Click the add title placeholder type Students Succeed Here!
- In the text box below the title, add a bulleted list with the following:
- Learning Success Center
- Academic Success Coaching
- English Language Learner Center
- Device Checkout
- CARE Office
- Select all of the text in the bulleted list, and ensure the font size is 28.
- On the view tab, in the Show group, check the box next to Ruler to turn show the vertical and horizontal ruler.
- On the Insert tab, in the images group, select Online Pictures. Use the Bing Image Search to search for a ‘success’ image. Insert an image of your choice into slide 6.
- On the Picture Tools Format tab, click the dialog box launcher in the Size grouping to launch the Format Picture dialog box. Set the height of the picture to 2”, and the width of the picture to 3”. If necessary, uncheck the Lock aspect ratio check box. Close the format picture dialog box.
- Select the image, and move it slowly to the left and right, up and down. Notice how markers, or Smart Guides appear on the slide and on the ruler. Use the smart guides to align the picture at approximately the .5” mark on the vertical ruler and the 3” mark on the lower half of the horizontal ruler.
- With the image still selected, on the Picture Tools Format tab, under Quick Styles, apply the Drop Shadow Rectangle Style to the image. Use the Format Painter to apply the same Quick Style to the pictures on slides 2 and 3.
- With slide 4 selected, on the Insert tab, in the Illustrations group, click the arrow next to shapes and under Stars and Banners select Explosion1. Draw another explosion shape slightly smaller than the one that is already there. The shape can be anywhere on the slide.
- With shape still selected, on the Drawing tools, Format tab, select the arrow next to shape fill and select the eyedropper. Use the eyedropper square window to move to the right side of the slide to find the color RGB Light Blue. Apply that color to the smaller Explosion image.
- With the smaller Explosion image still selected, move it so that it is layered on top of the larger Explosion image. Use the resizing handle to resize the lighter blue Explosion image so that it is now larger than the darker blue Explosion image. After resizing, it has a height of about 4” and a width of about 5”.
- With the lighter blue Explosion still selected, right click inside the image and select Move to Back. This will set the larger, lighter blue image behind the smaller, darker blue image. Move the images so that they layer on top of each other.
- Select the smaller, darker image first, press and hold the CTRL key on your keyboard, and then select the larger, lighter blue image. With both images selected, on the Drawing Tools Format tab, in the Arrange group, select the arrow and then select Group. Notice how the two images are now grouped together and can be moved as one image.
- Select slide 6 so that it is the active slide. On the Home Tab, in the Slides group, insert a new slide with the Title and Content layout. This will be the new slide 7.
- On slide 7, in the Click to add title content placeholder type Enrollment Steps. In the text box below that, click the SmartArt icon to add a SmartArt graphic.
- In the SmartArt graphic dialog box, under Process, select Step Down Process. Enter the following text, in order, in the text boxes: 1. Get Admitted, 2. Determine Placement, 3. Register, 4. Pay. If the SmartArt only has three boxes, add a shape by going to the “Create Graphic” option in the SmartArt Tools Design tab and click add a shape.
- With the SmartArt still selected, on the SmartArt Tools Design tab, select the arrow next to Change colors. Under Accent 2, select Gradient Range Accent 2.
- Under Quick Styles, under Best Match select Intense. Select the entire SmartArt, and move it up slightly so there is additional white space below it. Deselect the SmartArt.
- With slide 7 still active, on the Insert tab, in the Text group, select the arrow under WordArt and select the Fill-Blue, Accent1, shadow WordArt style. Click the outer edge of the WordArt text box to move it below the SmartArt. In the text box, type Register Early!
- With the WordArt still selected, on the Drawing Tools Format tab, in the Shape Styles group, select the bottom arrow to see additional Shape Styles. Select the second Shape Style under Theme Styles Colored outline – Blue, Accent 1.
- If necessary, decrease the font size of the Word Art to 32 and center the shape under the SmartArt.
- On the Review tab, under Proofing, run Spelling and Grammar check and make any corrections.
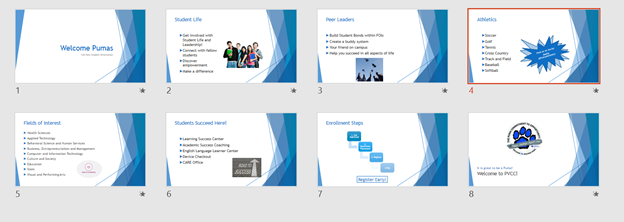
- Save your presentation, and take note of where it is located. There should be a total of 8 slides in your slide deck. Compare your presentation to the image below, and make any modifications if needed. Close out of PowerPoint and submit your entire presentation per your instructor’s instructions.
Media Attributions
- Practice It Icon by Jessica Parsons is licensed under a CC BY (Attribution) license
- Senior man at laptop by Andrea Piacquadio is licensed under a Pexels License license
- PowerPoint_Practice3_Step_20
